Table of Contents
Introduction
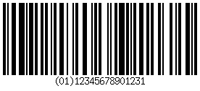
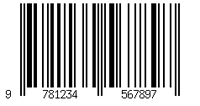
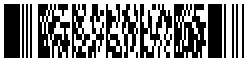
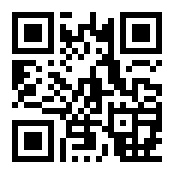
At its core, CNS Barcode is an app for scanning and generating barcodes. You can use this app for a variety of barcodes.
The power behind CNS Barcode is not just scanning and generating barcodes. CNS Barcode can be launched from other iOS apps on your device to extend those apps with these features. You will find just how powerful CNS Barcode can be in the following sections.
Note: CNS Barcode is not able to read Aztec, Data Matrix, or PDF417 barcodes from a photo, only from the live camera view.


Standalone Features
When you start CNS Barcode from your home screen, you will immediately see a view from your camera. Point your device at any compatible barcode and CNS Barcode will scan it. The default behavior after scanning a barcode is to present you with the Scanned Barcodes list on the right. This list also displays scans you have done in the past. From here you can tap your scans to see more information and/or share them with other apps on your device. If you want to scan another barcode, swipe the camera view back or tap the button containing the number of scans.
If the barcode you scan contains a URL, you can tap on it in the list and then press the Share button to open that URL. CNS Barcode can also be set to launch a URL automatically without prompting you. The type of URL in a barcode is not limited to a website. A URL can be used to create an email message, create an sms, dial a phone number, or launch and interact with other iOS apps you have on your device.
If you have images containing barcodes in your Photo Library, you can scan those as well. Tap on the Menu button or swipe from the left, to show the menu, then choose Photos. From here, tap Choose Photo to pick from your Photo Library. This will function the same as with using your device's camera where the scans will show up in the Scanned Barcodes list on the right
In addition to simply scanning barcodes and manually sharing the data with other apps, CNS Barcode includes a Profile system which allows you to manage how the app processes a barcode. With a Profile, explained in detail in the following sections, you can define a Launch URL used to launch another app with the data from a scanned barcode. A Default Profile is included with CNS Barcode that will launch Safari and perform a Google* search on the barcode data. To test this Profile, tap on the Menu button or swipe from the left, then tap Settings in the menu, tap the "Use Scanning Profile" setting, and select the 'Default' Profile.
Another option when starting CNS Barcode from your home screen is to generate barcodes. Tap on the Menu button or swipe from the left, and then tap Generate to define the type of barcode and the data to encode into the barcode. After generating a barcode, tap the Share button, or on the barcode image, to share it with other apps on your device.
Profiles
CNS Barcode allows you to create any number of Profiles that tell the app what to do with the barcode data you scan or with the barcodes you generate. You can create these Profiles in the Settings or with a cnsbarcode://addprofile URL. Profiles have the following settings:
Name
Each Profile must have a unique name so that you can specify it with a cnsbarcode:// URL.
Launch URL
CNS Barcode will launch this URL after you scan or generate a barcode. When entering the Launch URL for a Profile, you use the placeholder '::barcode::' to let CNS Barcode know where the data from the barcode you scanned or generated should be placed. For example, the Default Profile uses the URL: 'http://google.com/m/search?q=::barcode::'. If you scan a barcode with the value '1234', CNS Barcode will launch the URL: 'http://google.com/m/search?q=1234'. When you generate a barcode, the data used to generate the barcode is placed where '::barcode::' appears in the URL.
Scan multiple barcodes
When this option is turned on, CNS Barcode will allow you to scan more than one barcode before launching the Launch URL. When you are done scanning, tap the 'Done' button. Unless you have the 'Return multiple in URL' option turned on, CNS Barcode will then place all the barcodes you scanned onto the clipboard, one per line, and then launch the Launch URL. If any of the barcodes you scan have Carriage Returns or Line Feeds in the data, CNS Barcode replaces them with '::CR::' and '::LF::' respectively. This is to keep the data from each barcode on its own line on the clipboard.
Return multiple in URL
When this option and the 'Scan multiple barcodes' option are both on, CNS Barcode will return the data from multiple scans in the Launch URL instead of on the clipboard. Carriage Returns and Line Feeds found in barcode data are still replaced with '::CR::' and '::LF::' respectively. Multiple barcodes are separated with '::RS::'. (Warning: This may fail if you are scanning many barcodes or if the barcodes contain a lot of information.)
Flashlight
When this option is turned on, the LED Flashlight will be on automatically when you start scanning.
Use front Camera
When this option is on, the front-facing Camera will be active when you start scanning.
Return errors (Scanning Options)
When this option is turned on, CNS Barcode will launch the Launch URL if there is an error when scanning. Before CNS Barcode launches the Launch URL, it will replace the '::barcode::' placeholder with '::ERROR::' followed by an error message. When this option is turned off, the user remains in the CNS Barcode app if there an error that prevents the scanning operation from continuing.
Beep on Scan
When this option is turned on, you will hear a beep after each successful scan (unless your device is muted or you have your volume all the way down).
Copy barcode to Clipboard
When this option is turned on, CNS Barcode will place the generated barcode onto the clipboard after it is generated.
Save barcode to Photos
When this option is turned on, CNS Barcode will save the generated barcode into your Photo Library after it is generated.
Return errors (Generating Options)
When this option is turned on, CNS Barcode will launch the Launch URL even if there is an error generating the barcode. Before CNS Barcode launches the Launch URL, it will replace the '::barcode::' placeholder with '::ERROR::' followed by an error message. When this option is turned off, the user remains in the CNS Barcode app when there is a generation error.
Delete Profile
Use this button to delete the Profile you are viewing.
cnsbarcode URL Scheme
Other apps you have on your device can launch CNS Barcode using the cnsbarcode:// URL Scheme. This is a very powerful feature that allows you to add the functionality of scanning and generating barcodes to any app that can launch URLs and in turn be launched by a URL. An example of such an app is FileMaker Go. With a specially designed FileMaker Go database, you could, for example, press a button to launch CNS Barcode, scan a product barcode, and have CNS Barcode launch a URL to run a script in FileMaker Go. The FileMaker Go script could then use the barcode data to add a product to an invoice or locate an item in your product database.
The cnsbarcode:// URL Scheme is easy to use and several examples are included in the sections below. You can also check out the Tools tab above for example FileMaker databases.
Scanning Barcodes with cnsbarcode://scan
Use the 'scan' action to launch CNS Barcode for scanning a barcode. The format of the cnsbarcode://scan URL is as follows (items in square brackets are optional):
cnsbarcode://scan[?<parameter name>=<parameter value>[&<parameter name>=<parameter value>[&...]]]
The parameter names and possible values are defined below. None of them are required. If you specify a Profile with the 'profile' parameter, the 'launchurl' parameter and all of the 'scanXXX' parameters will be ignored. If you do not specify one of the 'yes'/'no' parameters, they all default to 'no' with the exception of the 'scanBeep' parameter which defaults to 'yes'.
Parameters
- profile
This is the name of the Profile you want CNS Barcode to use for processing barcodes you scan. - method
CNS Barcode will automatically bring up the camera view to scan barcodes with the built-in camera. However, you can specify the 'photo' method to automatically open the photo picker. - launchURL
This is the URL CNS Barcode will launch after scanning a barcode. This must be URL encoded if there are any special characters in it. (See below for more information.) - scanMultiple
Specify 'yes' to enable scanning multiple barcodes. - scanReturnMultipleInURL
Specify 'yes' to return the multiple scan data in the Launch URL instead of on the clipboard. (Warning: This may fail if you are scanning many barcodes or if the barcodes contain a lot of information.) - scanFlashlight
Specify 'yes' to turn the flashlight on. - scanUseFrontCamera
Specify 'yes' to use the front camera instead of the rear camera. - scanReturnErrors
Specify 'yes' to have CNS Barcode launch the Launch URL when an error occurs instead of leaving the user in the CNS Barcode app. - scanBeep
Specify 'yes' to hear a beep after each scan, or 'no' to silence the beep. (The default is to beep unless the application-wide setting is turned off.)
Here are a few examples of cnsbarcode://scan URLs:
Open CNS Barcode using Defaults
This will open CNS Barcode and bring up the camera scanning feature. If a barcode is scanned, the app will use the Launch URL from the Default Profile if defined, otherwise it will display the barcode data in the Scanned Barcodes list on the right. If the Default Profile is set to None, CNS Barcode will attempt to open or launch any URLs it finds in the barcode unless that option is not enabled.
cnsbarcode://scan
Specify a Profile
This will open CNS Barcode and bring up the camera scanning feature. If a barcode is scanned, the app will use the Launch URL from the 'Testing' Profile.
cnsbarcode://scan?profile=Testing
Automatically begin a Photo scan
This will open CNS Barcode and bring up the photo picker. If a barcode is scanned, the app will use the Launch URL from the 'Search' Profile.
cnsbarcode://scan?method=photo&profile=Search
Specify one-time settings
This will open CNS Barcode and bring up the camera scanning feature. You will be able to scan multiple barcodes and when you press the 'Done' button, it will launch the URL 'fmp://$/multiscan?script=scanresult'.
cnsbarcode://scan?scanmultiple=yes&launchurl=fmp://$/multiscan%3fscript%3dscanresult
Generating Barcodes with cnsbarcode://generate
Use the 'generate' action to launch CNS Barcode and generate a barcode. The format of the cnsbarcode://generate URL is as follows (items in square brackets are optional).
cnsbarcode://generate?type=<barcode type>&data=<barcode data>[&<parameter name>=<parameter value>[&...]]
The parameter names and possible values are defined below. The 'type' and 'data' parameters are required. Every other parameter is optional. If you specify a Profile with the 'profile' parameter, the 'launchurl' parameter and all the 'generateXXX' parameters will be ignored. If you do not specify one of the 'yes'/'no' parameters, they all default to 'no' with the exception of the 'generatecopyimage' parameter which defaults to 'yes'.
When using this feature to generate barcodes, there is no end-user interaction with the CNS Barcode app if a Launch URL is specified. The CNS Barcode app will swap to the front and almost immediately swap back to the original application. This can be a little disconcerting to an end-user. If you are developing a FileMaker Go database or some other application that needs to generate barcodes in this fashion, you should warn your users that their screen will swap out and back in during this process.
-
type
This is the type of barcode to create. See the Barcode Types tab above for the list of barcodes CNS Barcode can create. (Most of the names can be abbreviated.) -
data
This is the data to encode in the barcode. It must be the correct kind of data that can be encoded into the barcode type, otherwise an error will be generated. -
profile
This is the name of the Profile you want CNS Barcode to use after generating the barcode. -
launchurl
This is the URL CNS Barcode will launch after generating a barcode. This must be URL encoded if there are any special characters in it. (See below for more information.) -
generatecopyimage
Specify 'no' to prevent CNS Barcode from copying the generated barcode to the clipboard. -
generatesaveimage
Specify 'yes' to save the generated barcode to your Photo Library. (If CNS Barcode has been denied access to your Photo Library in iOS 6+ Privacy Settings, the image will not be saved.) -
generatereturnerrors
Specify 'yes' to have CNS Barcode launch the Launch URL when there is an error generating a barcode instead of leaving the user in the CNS Barcode app.
Here are a few examples of cnsbarcode://generate URLs
Open CNS Barcode to the generate tab
This will open CNS Barcode to the Generate tab allowing you to manually enter in the Barcode Type and Barcode Data. You can then tap the Share button to share the barcode with other apps.
cnsbarcode://generate
Specify a Profile
This will generate a Code 128 barcode with the data 'ABC123' and then use the Profile named 'Save Barcode' to do something with the generated barcode.
cnsbarcode://generate?type=code128&data=ABC123&profile=Save%20Barcode
Specify one-time settings
This will generate a QR Code barcode with a telephone number embedded in it and then launch the URL 'fmp://$/qrcodes?script=paste%20barcode'.
cnsbarcode://generate?type=qrcode&data=tel://8175555555&launchurl=fmp://$/qrcodes%3fscript%3dpaste%2520barcode
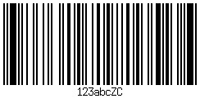
Ask for errors
This will attempt to generate a UPC E barcode with the data '123abc'. However, since the UPC E barcode can only contain numbers, CNS Barcode will generate the error 'Invalid characters in data' and launch the URL 'fmp://$/products?script=save_barcode¶m=::ERROR::Invalid%20characters%20in%20data'.
cnsbarcode://generate?type=upce&data=123abc&generatereturnerrors=yes&launchurl=fmp://$/products%3fscript%3dsave_barcode%26param%3d::barcode::
Adding Profiles with cnsbarcode://addprofile
Use the 'addprofile' action to launch CNS Barcode and add a new Profile. This allows other apps you have on your device to set up Profiles for you to use without you having to manually add them. The format of the cnsbarcode://addprofile URL is as follows (items in square brackets are optional):
cnsbarcode://addprofile?name=<parameter value>[&<parameter name>=<parameter value>[&...]]
The parameter names and possible values are defined below. You can specify all of them in the URL, or only the ones you need. The only required parameter is the 'name' parameter, which you use to reference the new Profile in other cnsbarcode:// URLs. If you do not specify one of the 'yes'/'no' parameters, they all default to 'no' with the exception of the 'scanbeep' and 'generatecopyimage' parameters which default to 'yes'. Each of these parameters correspond to a Profile setting described in the Profiles section above.
When CNS Barcode is launched with a cnsbarcode://addprofile URL, it will present you with an 'Add Profile' screen for you to accept the new Profile. If you already have a Profile with the name of the new Profile, you will be prompted to overwrite it.
-
name
This is the name for the Profile you are adding. If you want to include a space in the Profile name, use %20 in place of the space. (This is called URL encoding. See that section of this documentation for more information.) -
launchurl
This is the URL CNS Barcode will launch after scanning or generating a barcode. This must be URL encoded if there are any special characters in it. (See the URL Encoding section of this documentation for more information.) -
scanmultiple
Specify 'yes' to enable scanning multiple barcodes. -
scanReturnMultipleInURL
Specify 'yes' to return the multiple scan data in the Launch URL instead of on the clipboard. (Warning: This may fail if you are scanning many barcodes or if the barcodes contain a lot of information.) -
scanflashlight
Specify 'yes' to turn on the light when scanning. -
scanusefrontcamera
Specify 'yes' to use the front camera instead of the rear camera. -
scanreturnerrors
Specify 'yes' to have CNS Barcode launch the Launch URL when an error occurs instead of leaving the user in the CNS Barcode app. -
scanbeep
Specify 'yes' to hear a beep after each scan, or 'no' to silence the beep. (The default is to beep unless the application-wide setting is turned off.) -
generatecopyimage
Specify 'no' to prevent CNS Barcode from copying the generated barcode to the clipboard. -
generatesaveimage
Specify 'yes' to save the generated barcode to your Photo Library. (If CNS Barcode has been denied access to your Photo Library in iOS 6+ Privacy Settings, the image will not be saved.) -
generatereturnerrors
Specify 'yes' to have CNS Barcode launch the Launch URL when there is an error generating a barcode instead of leaving the user in the CNS Barcode app.
Here are a few examples of cnsbarcode://addprofile URLs:
Add a simple Profile
This adds a Profile named 'Testing' with the Launch URL 'http://google.com/m/search?q=::barcode::'.
cnsbarcode://addprofile?name=Testing&launchurl=http://google.com/m/search%3fq%3d::barcode::
Add a multi-scan Profile
This adds a Profile named 'MultiScan' that has the 'Scan multiple barcodes' option enabled and uses the Launch URL 'fmp://$/multiscan?fscript=scanresult'.
cnsbarcode://addprofile?name=MultiScan&scanmultiple=yes&launchurl=fmp://$/multiscan%3fscript%3dscanresult
Add a Profile for Generating Barcodes
This adds a Profile named 'Save Barcode' that will save a generated barcode to your Photo Library.
cnsbarcode://addprofile?name=Save%20Barcode&generatecopyimage=no&generatesaveimage=yes
URL Encoding
It is important to note that when specifying the 'name' and 'launchurl' parameters in a cnsbarcode:// URL, you must encode the values for CNS Barcode to correctly extract them. For the 'name' parameter, this usually means that if you want a space in the Profile Name, you have to replace it with '%20'. Though, if you are also wanting to include any of the punctuation below in your Profile Name, you will need to encode those punctuation marks as well.
The more difficult task is making sure the 'launchurl' parameter is encoded properly. This can seem a little difficult because you are specifying one URL inside of another URL. However, if you replace the following characters with their encoded equivalents, you should not have any problem:
- % - %25
- ? - %3f
- & - %26
- = - %3d
If the Launch URL you are encoding already contains encodings like these, you will end up with double-encodings. For example, if a URL looks like the following before encoding:
fmp://$/mydb?script=My%20Script¶m=something
Then after encoding, the URL will look like this:
fmp://$/mydb%3fscript%3dMy%2520Script%26param%3dsomething
Notice that there was already a %20 in the URL before encoding, so after encoding, it became %2520.
Remember, you only have to encode the Launch URLs like this when using them as the 'launchurl' parameter of a cnsbarcode:// URL. If you are manually typing in a Launch URL in the CNS Barcode Settings, you do not need to do all of this extra encoding.
Settings
The Settings tab allows you to define settings for CNS Barcode. Each section is described below:
Profiles - This section contains all the currently defined Profiles and provides you with a way to add new Profiles. If you no longer need a Profile, select it, and then press the 'Delete Profile' button at the bottom.
cnsbarcode:// Settings - This section contains the settings used when you start CNS Barcode with a cnsbarcode:// URL.
- Default Scanning Profile - This is the Profile used for any cnsbarcode://scan URLs if one is not specified with the 'profile' parameter.
- Default Generation Profile - This is the Profile used for any cnsbarcode://generate URLs if one is not specified with the 'profile' parameter.
Standalone Settings - This section contains the settings used when you start CNS Barcode from your home screen.
- Auto Show URLs - Set to On to automatically show an embedded URL found in a barcode.
- Use Scanning Profile - This setting allows you to define a Profile for CNS Barcode to use after scanning a barcode instead of simply presenting the barcode data to you.
Misc Settings
- Beep on Scan - When this option is turned on, you will hear a beep after each successful scan (unless your device is muted or you have your volume all the way down).
- Seconds Between Scans - The number of seconds to pause after scanning a barcode before another barcode can be scanned. Adjust this setting if you find the app scanning the same barcode more than once.
- Seconds After Generate - This defines the number of seconds to pause after generating a barcode before returning to the calling application. Adjust this setting if FileMaker Go 11 is crashing when returning from CNS Barcode. (FileMaker Go 12 and above do not seem to have this issue and it's possible you can adjust this down to 0 seconds.)
Credits / Copyrights / Attributions
Comm-Unity Networking Systems, LLC. is:
- Jake Traynham: Concept, Design, Programming, Technical Support
- Jesse Traynham: Concept, Design, Beta testing
- Safari is a trademark of Apple, Inc. (http://apple.com/), registered in the U.S. and other countries.
- Google is a trademark of Google, Inc. (http://google.com/)
- FileMaker and FileMaker Go are trademarks of FileMaker, Inc. (http://filemaker.com/), registered in the U.S. and other countries.
- Barcode scanner based on the ZBar Bar Code Reader (http://sourceforge.net/projects/zbar)
- Barcode generator based on the Zint library (http://www.zint.org.uk/)
- All other trademarks are the property of their respective owners. All rights reserved.